Encoded Media's new ARM Cortex-based HDMI endpoint for wired networks is our most compact, most reliable IPTV set-top box ever.
For IPTV400 features and specifications, please see the Encoded Media web site.
Hardware Setup
- Unpack the IPTV400 endpoint from its packaging. Ensure the IR remote, HDMI cable, power adapter and batteries are present, together with an Ethernet cable for connecting to the network
- Connect the network cable to the rear of the device, and use the HDMI cable to connect the HDMI output port to your TV or display
- Switch the source on your display to the corresponding HDMI input and plug the supplied power adapter into the IPTV400's DC input port
- The box will power on automatically and the LED indicator will light up. You will see the Encoded Media logo the moment the device starts
Software Setup
- At the blue Connecting screen, press the ☰ or MENU button on your IR remote control to enter the Settings menu.
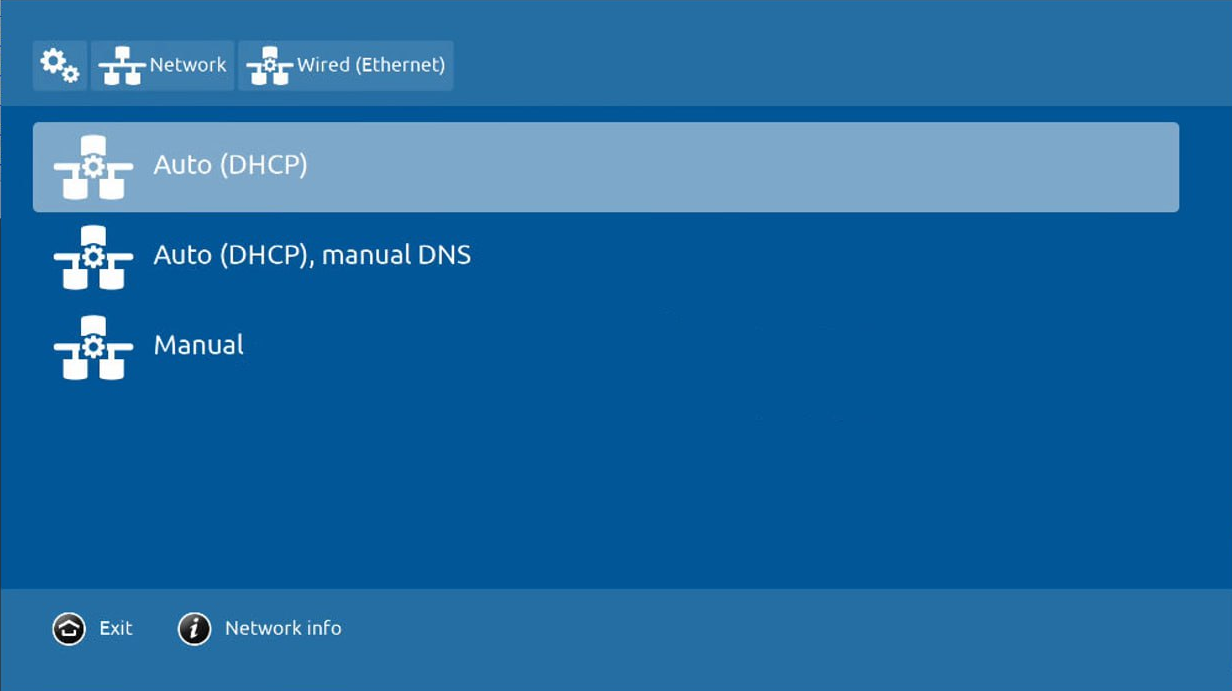
- In Network, select Auto (DHCP), Auto (DHCP) with manual DNS, or Manual
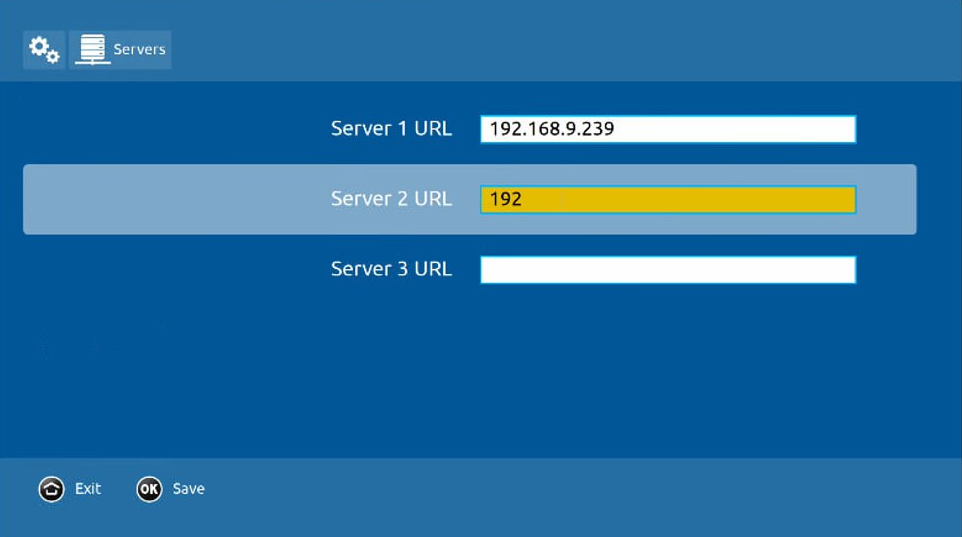
- In Servers, add the IP address or hostname of at least one TV Server on your network
- Press the ⌂ or EXIT button on your IR remote control to leave the Settings menu and return to the Connecting screen
Connecting Screen Overview
The blue Connecting screen gives you an overview of your IPTV400 endpoint configuration:
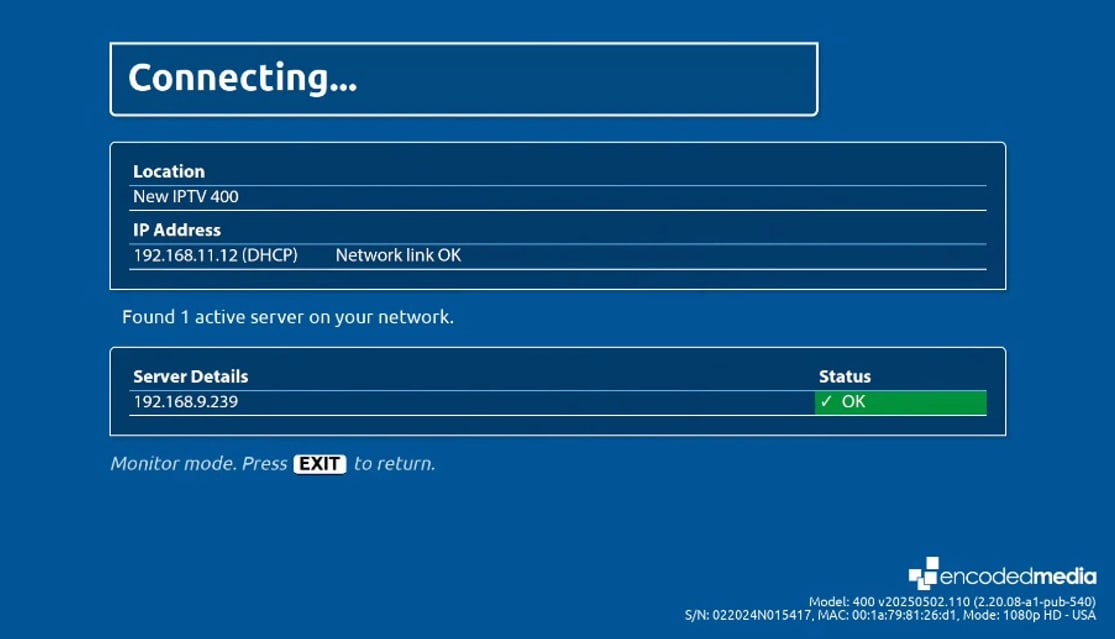
- Location
User-configurable field (see Settings, Device) allowing you to give your new endpoint a descriptive name
- IP Address
Displays the endpoint IP address, together with whether the IP address has been assigned manually (static) or automatically (DHCP)
- Network link
If your network is connected, OK will be displayed in white. Otherwise, you will see No network link flashing in red. If the server is uncontactable, Cannot contact server will be displayed in red.
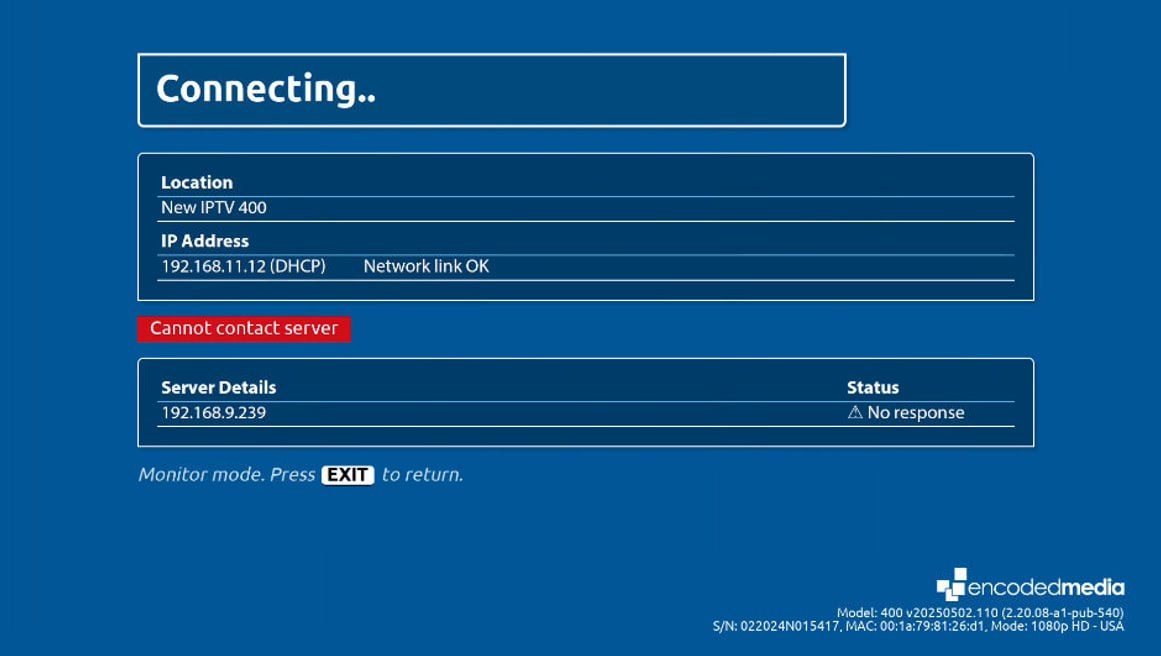
- Server Details
The list of IP addresses or hostnames of your Encoded Media TV Server or HD Encoder appliances which provide the endpoint with channel lists and streams. In the Status column, No response indicates the server is not replying to requests from the endpoint.
To amend the above details, press ☰ or MENU on your IR remote control to enter the Settings menu. Otherwise, the box will automatically connect to the configured TV Server or HD Encoder source.
Settings Overview
⚠️ Be sure to consult your IT administrator before making any changes to the below settings.
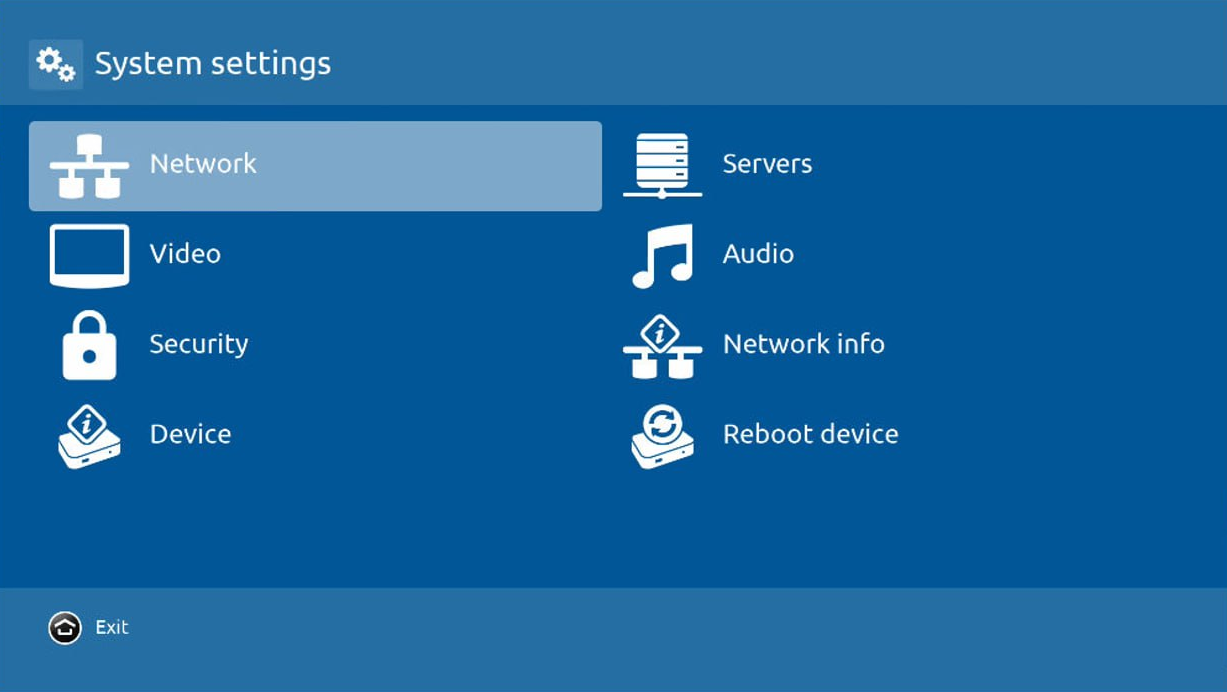
- Network
Configure the IPTV400's network details. Select between Auto (DHCP), Auto (DHCP) with manual DNS, and Manual
- Servers
Provide the IP addresses or hostnames of up to three TV Server or HD Encoder appliances
- Video
Select the video graphics resolution
- Audio
Set the initial volume level and audio mode. Stereo plays left and right channels as-is, Mono mixes both into one identical channel, Mono (L/R) forces only one channel to both speakers, and Lt/Rt is not used in this version of the hardware.
- Security
Protect changes to endpoint settings by setting an Administrator PIN
- Network Info
For engineer diagnosis. Displays a live view of the endpoint's wired network configuration and link status
- Device
Change the displayed location of the endpoint. This setting is purely to help administrators quickly identify different endpoints within a large office
- Reboot device
Select this option and a confirmation screen will ask you if you wish to restart the endpoint

